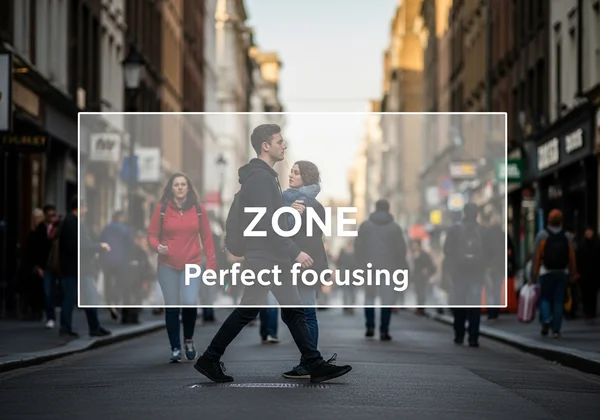
Zone Focusing for Street Photography: Master DOF with Our DOF Calculator
Street photography is the art of the decisive moment. It’s about capturing candid, fleeting scenes that tell a story in a single frame. But in a world that moves so fast, fumbling with autofocus can mean the difference between a timeless shot and a missed opportunity. This is where zone focusing comes in—a classic technique that lets you shoot from the hip with confidence. But how can you guarantee sharp shots without hesitation? This guide will not only demystify the art of zone focusing but also introduce you to the modern, precise way to master it. By using a powerful online tool, you can eliminate guesswork and turn your camera into an extension of your creative vision.
What is Zone Focusing: Why This Depth of Field Photography Technique is Crucial for Street Photography
At its core, zone focusing is a manual focusing technique where you pre-set your lens to be sharp within a specific distance range, or "zone." Instead of focusing on a specific subject, you focus on a distance. Anything that enters that predetermined zone—whether it’s a person walking past a colorful mural or a cyclist turning a corner—will be acceptably sharp. This method liberates you from the need to acquire focus for every single shot, allowing you to react and capture moments instantaneously. For the unpredictable and fast-paced environment of the street, this is a game-changer.
The Challenge of Capturing Fleeting Moments
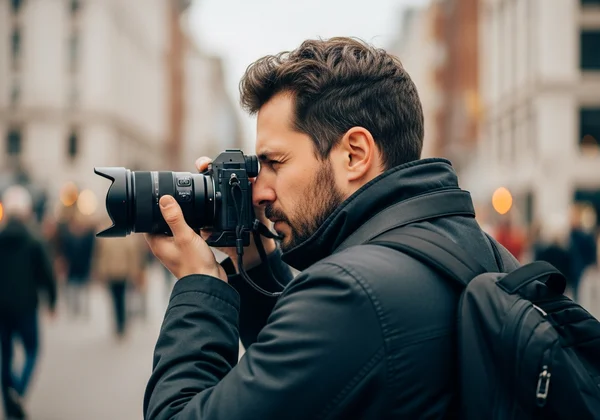
Modern autofocus systems are incredible, but they aren't flawless, especially in the chaotic world of street photography. They can hunt for focus in low light, lock onto the wrong subject in a busy scene, or simply be too slow to catch a sudden gesture or expression. These street photography challenges can be frustrating, causing you to miss the very moments you set out to capture. Zone focusing bypasses this entire process. With your focus already locked in, your only job is to compose and click the shutter at the perfect instant. It shifts your mental energy from technical adjustment to creative observation, which is the heart of great street photography.
Understanding the Zone: Depth of Field (DOF) & Hyperfocal Distance Basics
The "zone" in zone focusing is your Depth of Field (DOF). Simply put, DOF is the area in your image, from near to far, that appears acceptably sharp. It's not just a single point; it's a range. This range is determined by three key factors: your aperture, your lens's focal length, and the distance you are focused at. A wider aperture (like f/2.8) gives you a shallow depth of field, ideal for blurry backgrounds. A smaller aperture (like f/11) creates a deep depth of field, keeping more of the scene in focus. Understanding this is the first step. The next is mastering hyperfocal distance—the magic focusing point that gives you the maximum possible depth of field, keeping everything sharp from a nearby point all the way to infinity. These concepts are the foundation of effective zone focusing, and our DOF Calculator makes understanding them incredibly simple.
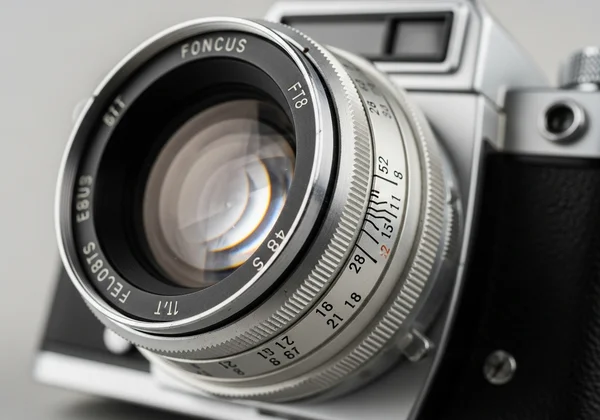
Traditional Manual Zone Focusing: The "Guesstimate" Approach
For decades, photographers relied on the markings etched onto their lens barrels to set their focus zones. They would use the distance scale in conjunction with the depth of field markings to estimate their sharp zone. This method, while effective for experienced photographers, often involves a significant amount of estimation and mental math. It requires you to become adept at judging distances by eye and trusting that your estimations are accurate enough for a sharp photo. While this traditional approach has a certain romantic appeal, it leaves room for error that can lead to soft, unusable images.
Setting Your Camera for Quick Shots
The classic method for manual focus street photography involves a few key settings. First, you switch your lens to manual focus. Next, you select a moderately small aperture like f/8 or f/11 to ensure you have a reasonably deep depth of field to work with. Then, you estimate a common shooting distance, perhaps 10 feet (or 3 meters), and set your focus to that mark on your lens. The idea is that your depth of field will now cover a usable zone, for instance, from 7 feet to 15 feet. As long as your subject falls within this estimated range, your shot should be sharp. This is a great starting point, but it lacks the precision needed for consistently professional results.
The Art (and Risk) of Estimating Distances and Apertures
The primary challenge with the traditional method is its reliance on approximation. Is your subject 8 feet away or 12? Does your chosen aperture provide a zone that’s 5 feet deep or 10? Misjudging these distances, even slightly, can push your intended subject just outside the zone of sharpness. Furthermore, older lenses had detailed, reliable markings, but many modern lenses lack these comprehensive scales, making the "guesstimate" approach nearly impossible. This is where a modern solution becomes not just helpful, but essential for accuracy. You need a tool that can provide precise data for your exact camera and lens combination, which is where a dedicated focus calculator shines.
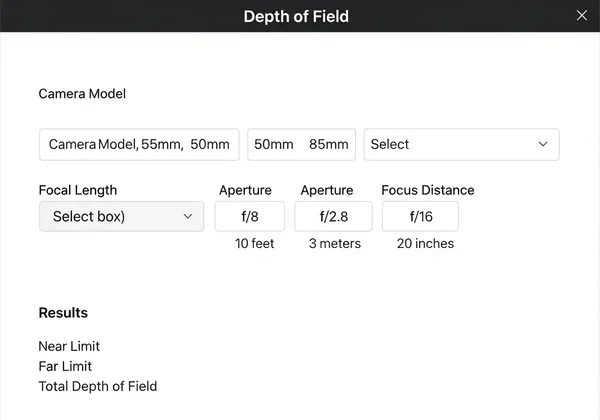
Mastering Your Sharp Zone: Using the DOF Calculator for Precision
Why guess when you can know for sure? The traditional method of zone focusing has its place, but for digital photographers who demand precision, a dof calculator for street photography is the ultimate tool. Our online DOF Calculator transforms the process from an art of estimation into a science of certainty. It takes your exact camera settings and instantly provides you with the precise boundaries of your sharp zone, down to the inch. This allows you to plan your shots with confidence, knowing exactly where your zone of sharpness begins and ends.
Step-by-Step: Define Your Zone with Precision
Using our tool to calculate your focus zone is straightforward and intuitive. Here’s how you can do it in seconds and finally understand how to calculate depth of field without complex formulas:
- Select Your Camera: Choose your camera model from our extensive dropdown list. This automatically sets the correct sensor size and Circle of Confusion for precise calculations.
- Enter Focal Length: Input the focal length of the lens you’re using (e.g., 35mm).
- Set Your Aperture: Dial in the aperture you plan to shoot with (e.g., f/8).
- Input Your Focus Distance: Enter the distance you want to pre-focus at (e.g., 10 feet).
Instantly, the results will show you the exact near limit, far limit, and total depth of field. For example, you might find your sharp zone extends from 7.5 feet to 15.8 feet. Now you have a clearly defined, reliable zone to work within. You can calculate your zone before you even leave the house.
Finding Your Hyperfocal Sweet Spot
For street photographers who want to maximize their depth of field, the hyperfocal distance is the ultimate setting. Focusing at this specific distance gives you the largest possible sharp zone, extending from half the hyperfocal distance all the way to infinity. Our hyperfocal distance calculator instantly computes this value for you. Simply input your camera, focal length, and aperture, and it will tell you the exact distance to focus at. Setting your lens to this "sweet spot" is perfect for landscape-style street scenes where you want everything from the mid-ground to the distant skyline to be perfectly sharp.
Visualizing Your Depth: Seeing the Sharp Zone in Action
Numbers are great, but seeing is believing. One of the most powerful features of our calculator is the dynamic visualization chart. As you adjust your settings, you’ll see a graphic that visually represents your depth of field. The blue area shows your zone of acceptable sharpness, and a red line indicates your precise point of focus. This feature is invaluable for learning how different settings interact. You can immediately see how closing your aperture widens the blue zone or how changing your focal length affects the entire range. This visual feedback makes abstract concepts tangible, helping you build a stronger intuitive understanding of depth of field. Try our lens simulator to see for yourself.
Practical Tips for Optimal Street Photography Settings
Having a precision tool is one part of the equation; knowing how to apply it in the field is the other. Mastering zone focusing also involves making smart choices about your camera settings to best suit the environment and your creative goals. The right combination of aperture, focal length, and shutter speed will ensure your pre-calculated focus zone works perfectly in practice.
Best Aperture Choices for Zone Focusing
When it comes to aperture depth of field, there is a sweet spot for street photography. Apertures between f/8 and f/16 are generally considered ideal. This range provides a deep depth of field, which creates a larger and more forgiving sharp zone, without being so small that you run into issues with diffraction (a loss of sharpness at very small apertures). An aperture of f/8 is a fantastic starting point. It offers a great balance between a deep sharp zone and allowing enough light to hit your sensor for a fast shutter speed, which is crucial for freezing motion on the street. Use our f stop calculator to compare how different apertures affect your zone.
Lens and Focal Length Considerations
Your choice of lens and focal length has a massive impact on zone focusing. Wider angle lenses (typically 28mm, 35mm, and 50mm on a full-frame camera) are street photography staples for a reason. They naturally have a deeper depth of field compared to telephoto lenses at the same aperture setting. This inherent characteristic makes it much easier to create a large, workable focus zone. A 35mm lens, for example, is often favored because it offers a natural field of view that is wide enough to capture context but not so wide that it creates excessive distortion. You can use a focal length calculator to see precisely how a 28mm lens provides a deeper DOF than a 50mm lens with the same settings.
Elevate Your Street Shots: Practice with Our DOF Calculator
Zone focusing is more than just a technique; it's a mindset that fosters anticipation and intuition. By removing the technical barrier of focusing, it allows you to connect more deeply with the world around you and capture life as it unfolds. While the traditional method relied on experience and guesswork, you now have the power of precision at your fingertips. Our online DOF Calculator removes all ambiguity, giving you the exact data you need to set your focus with absolute confidence. Plan your zones, find your hyperfocal distance, and visualize the results before you take a single picture. Stop missing moments. It's time to take control of your focus and elevate your street photography. Master zone focusing today and see the difference precision makes.
Frequently Asked Questions About Zone Focusing
What is Depth of Field (DOF) in Simple Terms?
Depth of Field (DOF) is the distance range in a photo that appears acceptably sharp. It is not just the single point you focus on but a zone in front of and behind that point. A shallow DOF means only a small area is in focus (creating a blurry background), while a deep DOF means a large area from near to far is sharp.
How Does Hyperfocal Distance Relate to Zone Focusing?
Hyperfocal distance is the closest distance at which you can focus while keeping objects at infinity acceptably sharp. When you focus at this specific distance, you achieve the maximum possible depth of field for your given aperture and focal length. It's an advanced form of zone focusing used to get as much of the scene in focus as possible. Our hyperfocal distance tool calculates this for you instantly.
Can I Get Everything in Focus with Zone Focusing?
Yes, this is a primary goal of zone focusing, especially when using the hyperfocal distance. To get everything in focus photography-style, you would use a tool to find your hyperfocal distance for a small aperture (like f/11 or f/16). By focusing at that distance, your depth of field will extend from a nearby point all the way to the horizon, ensuring maximum sharpness throughout your scene.
Which Aperture is Best for Zone Focusing on the Street?
For most street photography situations, an aperture between f/8 and f/11 is ideal. This range offers a deep depth of field, creating a large and forgiving zone of sharpness. This makes it easier to capture subjects at varying distances without needing to readjust your focus, all while letting in enough light to maintain a motion-freezing shutter speed.