Why Your Blurry Backgrounds Fail: Common DOF Mistakes & How a DOF Calculator Helps
You’ve seen them everywhere: stunning portraits where the subject is perfectly sharp, and the background melts away into a creamy, dreamlike blur. This beautiful effect, known as "bokeh," is what separates a simple snapshot from a professional-looking photograph. But when you try to replicate it, you end up with a flat image where everything is in focus. It's a frustrating experience, but you're not alone. Many photographers struggle with these common dof mistakes. What is depth of field in photography, and how can you finally master it?
Achieving that coveted shallow depth of field (DOF) isn't magic; it's about mastering a few key principles. It often comes down to easily avoidable errors in your technique and settings. This guide will walk you through the most frequent pitfalls that keep your backgrounds sharp and show you exactly how to fix them. Crucially, a powerful tool can help you eliminate guesswork: our intuitive DOF Calculator.

Understanding Why Your Background Isn't Blurry: Common Pitfalls
To fix a blurry background, first, let's figure out what's causing it. A blurry background is the result of a shallow depth of field—meaning only a very thin slice of your scene is in sharp focus. When your background is too clear, it means your depth of field is too deep. Here are the most common culprits.
Mistake 1: Standing Too Far from Your Subject
One of the most overlooked variables in controlling depth of field is distance. The physics of optics dictates that the closer your camera is to your subject, the shallower your depth of field will be. If you’re standing across the park to take a portrait, even with the right lens and aperture, you’ll struggle to separate your subject from the background.
The fix is simple: get closer! Physically move your feet and reduce the distance between your lens and your subject. You will immediately notice the background beginning to soften. This simple adjustment dramatically enhances the background blur, making your subject pop.
Mistake 2: Your Subject is Too Close to the Background
Equally important as the camera-to-subject distance is the subject to background distance. If your subject is standing right in front of a brick wall, that wall will be too close to fall out of the shallow focus plane. You need to create separation and give the background space to blur.
To correct this, ask your subject to take several steps away from the background. The more distance you create between them and whatever is behind them, the more out of focus that background will become. This technique is essential for turning distracting scenery into a soft, non-competing backdrop.
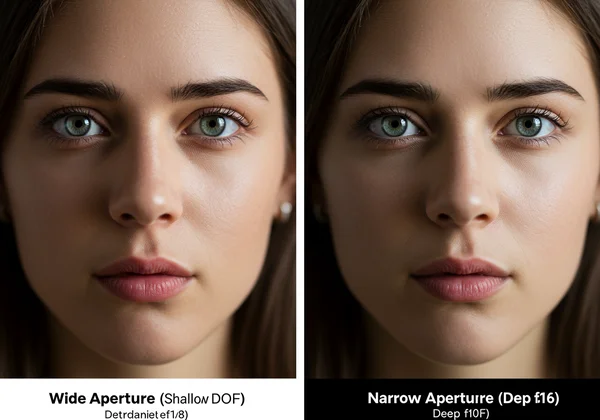
Mistake 3: Using an Aperture That's Too Small (High f-number)
If there's one technical mistake I see most often when photographers are chasing bokeh, it's this one. Many beginners leave their camera in "Auto" mode or use a high f-number (like f/8, f/11, or f/16) because they believe it makes everything sharper. While that's true, it’s the opposite of what you want for a blurry background.
Aperture is the opening in your lens that lets light in. A wider opening (represented by a low f-number like f/1.8, f/2.8, or f/4) creates a much shallower depth of field. To fix this, switch your camera to Aperture Priority mode ("A" or "Av") and dial in the lowest f-number your lens allows. Visualizing how different f-stops impact your shot can be tricky, which is why using an f stop calculator beforehand helps you plan the perfect settings.
Mastering Your Settings to Get More Bokeh & Avoid DOF Mistakes
If you've nailed your positioning but still aren't getting that creamy blur, it's time to dive into your camera settings. Your camera and lens play a massive role in achieving beautiful bokeh and avoiding troubleshooting shallow dof in the future.
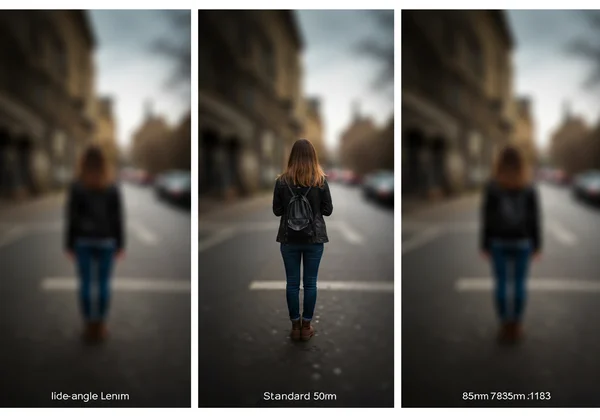
Mistake 4: Choosing the Wrong Focal Length
Not all lenses are created equal when it comes to background blur. A wide-angle lens (e.g., 24mm) is designed to capture a broad scene and tends to produce a deep depth of field. A telephoto lens (e.g., 85mm, 135mm, or 200mm) compresses the background and makes it appear much blurrier, even at the same aperture setting.
If you’re using a standard kit lens, zoom it in as far as it will go. If you have multiple lenses, choose one with a longer focal length. An 85mm lens is often called the classic "portrait lens" for this very reason. You can simulate this effect and see how different lenses perform with a good focal length calculator.
Mistake 5: Overlooking Your Camera's Sensor Size
This concept is a bit more advanced, but it has a huge impact on your final image. The size of the image sensor in your camera affects the depth of field. Cameras with larger, full-frame sensors naturally produce a shallower depth of field compared to cameras with smaller APS-C (crop) sensors, all other factors being equal.
While you can't change your camera's sensor, understanding its characteristics is key. If you have a crop sensor camera, you’ll need to work harder to achieve blur—meaning you must use an even wider aperture, get closer to your subject, or use a longer focal length to compensate. A crop sensor calculator can help you understand the equivalent settings you'd need to match a full-frame look.
Mistake 6: Not Planning for Hyperfocal Distance (When You Want Deep DOF)
While we're focused on creating a shallow depth of field, it's just as important to understand its opposite if you want to truly master DOF control. Hyperfocal distance is the focusing point that gives your photo the greatest possible depth of field, making everything from a certain point in the foreground to infinity acceptably sharp. This is the goal for landscape photographers, not portrait shooters.
Confusing these goals can lead to frustration. If you're trying to get maximum sharpness for a landscape, you need a hyperfocal distance calculator. If you're trying to get a blurry background for a portrait, you need to do the opposite: avoid a deep focus plane. Knowing the difference is a hallmark of a skilled photographer.
Mistake 7: Guessing Instead of Calculating Your DOF
Perhaps the most common underlying mistake is relying on guesswork. You can get close, get your subject away from the background, open up your aperture, and zoom in—but are you sure you have enough depth of field to get both of your subject's eyes in focus? Is the background blurry enough?
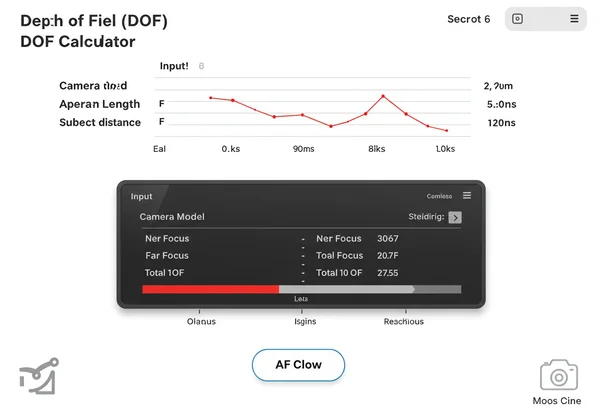
While photography is an art, it’s also governed by the laws of physics. Instead of wasting time with trial and error on a shoot, you can plan your exact depth of field in seconds. This is where a precise online tool becomes your greatest asset. When you calculate depth of field before you shoot, you take control. You can input your camera, lens, aperture, and distance, and see exactly what will be in focus—down to the centimeter.
Your Path to Perfect Blurry Backgrounds: Practice and Precision
Creating that beautiful, professional-looking background blur isn't a secret; it's a science you can master. By avoiding these common mistakes, you can take deliberate control over your images. Remember the key principles: get closer to your subject, create distance between your subject and the background, use a wide aperture (low f-number), and choose a longer focal length.
Ultimately, mastering blurry backgrounds comes down to deliberate practice and planning. Move beyond guesswork and embrace the precision that sets professionals apart. Our powerful, intuitive DOF Calculator lets you visualize your results before you ever press the shutter, giving you the confidence to create stunning portraits.
Ready to elevate your photography? Try our free tool today and experience the impact of precise planning firsthand.
Frequently Asked Questions About Depth of Field & Blurry Backgrounds
What exactly is Depth of Field (DOF) in photography?
Depth of field (DOF) refers to the range of distance in a photograph that appears acceptably sharp. A "shallow" or "thin" DOF means only a small area is in focus, leading to a blurry background and foreground. A "deep" or "large" DOF means a large area of the image is in focus, from the foreground to the background.
How does aperture truly affect the depth of field?
Aperture has a direct and dramatic impact on depth of field. A wide aperture (like f/1.4 or f/2.8) lets in a lot of light and creates a very shallow depth of field, which is ideal for blurry backgrounds. A narrow aperture (like f/11 or f/16) lets in less light and creates a very deep depth of field, keeping most of the scene sharp.
Does focal length really impact how blurry my background gets?
Yes, absolutely. Longer focal lengths (telephoto lenses) compress the perspective and magnify the background, which significantly enhances the blur effect. An 85mm lens at f/2.8 will produce a much blurrier background than a 35mm lens at f/2.8, even if the subject is framed identically.
What's the quickest way to get a super blurry background?
For the fastest results, combine these four things: 1) Use the longest lens you have. 2) Set it to the widest aperture (lowest f-number). 3) Get as close to your subject as you can while still composing the shot well. 4) Make sure there is a lot of distance between your subject and the background.
Can a DOF calculator really help me avoid these mistakes?
Definitely. A DOF calculator is a planning tool that removes the guesswork. It allows you to enter your exact settings (camera, lens, aperture, focus distance) and instantly see your depth of field. This helps you understand if your settings will produce the blurry background you want, ensuring you get the perfect shot without endless trial and error. It's the best way to plan your shots with confidence.