Mastering Aperture Priority Photography: A DOF Calculator Guide
Have you ever found yourself in a fast-paced shooting environment, like a busy street or a live event, and realized you missed the perfect shot? Many photographers struggle to balance technical settings with the need for speed. You want that beautiful, blurry background, but you also need to make sure your subject is sharp. The pressure of manual mode can sometimes make you miss a fleeting moment.
How can you maintain creative control over your focus without slowing down? The secret lies in combining your camera’s Aperture Priority mode with a precise digital planning tool. By using a specialized DOF calculator, you can predict exactly how much of your scene will be sharp before you even press the shutter button.
This guide will show you how to bridge the gap between technical planning and spontaneous shooting. We will explore how to use semi-automatic settings to keep your eyes on the subject while ensuring your depth of field (DOF) is exactly where you want it. Whether you are a hobbyist or a professional, this workflow will help you shoot with more confidence and precision.
How Aperture Priority Controls Depth of Field
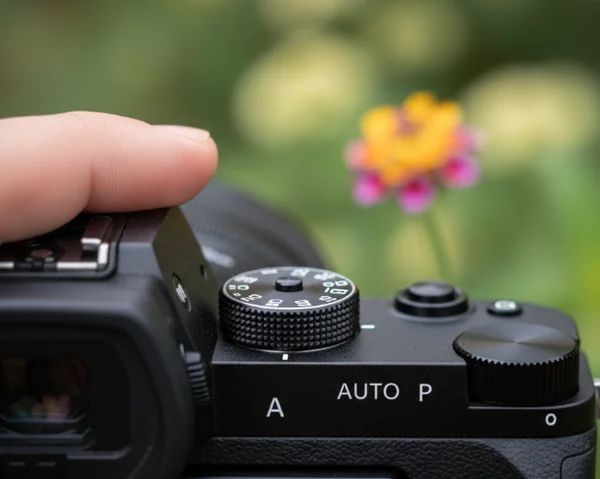
The aperture priority dof calculator workflow is a game-changer for photographers who want to focus on their composition rather than their dials. In Aperture Priority mode (usually marked as A or Av on your camera dial), you choose the f-stop, and the camera automatically calculates the shutter speed for a perfect exposure. This gives you direct control over the "look" of the image.
Why Aperture Priority is Your DOF Best Friend
Aperture Priority is the most popular mode for professional portrait and landscape photographers for one reason: it prioritizes the depth of field. Since the aperture (the f-number) is the primary factor affecting how much of the image is in focus, selecting it manually ensures your creative vision is met.
In Aperture Priority mode, the camera adjusts exposure as light changes. This frees you to focus solely on depth of field. If you know you need a shallow background for a portrait, you set f/1.8 and let the camera do the rest. If you need a sharp landscape, you set f/11. To get the most out of this, you should simulate your lens’s DOF to understand how these numbers translate to real-world distances.
Step-by-Step: Pre-Shooting Planning with DOF Calculator
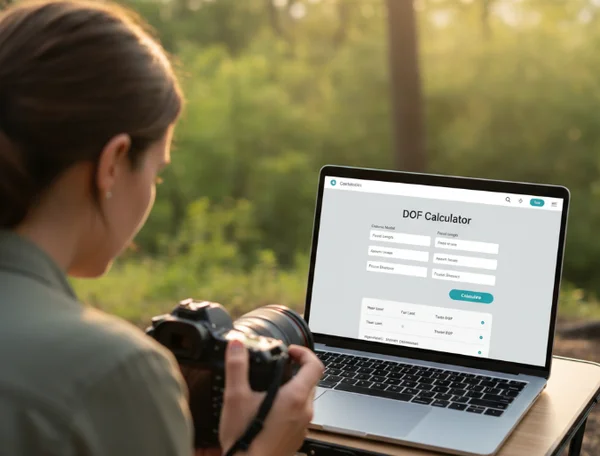
Before you head out to shoot, a few minutes of planning can save hours of frustration. Here is how to use an online dof calculator to prepare:
- Select Your Gear: Enter your camera model and focal length into the tool. This is important because a 50mm lens on a full-frame camera behaves differently than on a crop-sensor camera.
- Set Your Desired Aperture: Choose the f-stop you plan to use (e.g., f/2.8 for portraits or f/8 for street photography).
- Estimate Your Distance: Think about how far away your subject will be. If you are shooting a person three meters away, enter "3m" into the calculator.
- Analyze the Results: Look at the "Total Depth of Field." This number tells you the exact size of the "sharp zone."
By using this planning process beforehand, you memorize the "safe zones" for your lens. You will know that at f/4 and three meters away, you have about 40 centimeters of sharpness to work with.
Translating Calculator Data to Camera Settings
Once you have the data from the calculator, it is time to apply it. If the calculator tells you that your depth of field is too thin (for example, only 2 centimeters), you might realize that any slight movement from your subject will cause them to be out of focus.
In this case, you can quickly adjust your aperture on the camera to a higher number, like f/5.6, to widen that sharp zone. Because you are in Aperture Priority mode, the camera instantly adjusts the shutter speed to compensate. This allows you to stay reactive. You aren't just guessing; you are making informed decisions based on the data you gathered during your planning phase.
Semi-Auto Focus Planning for Dynamic Scenes
Shooting moving subjects is one of the hardest things in photography. This is where semi-auto focus planning becomes essential. When your subject is moving, you don't have time to recalculate your settings constantly. You need a strategy that covers the area where the action is happening.
Calculating Focus Points for Moving Subjects
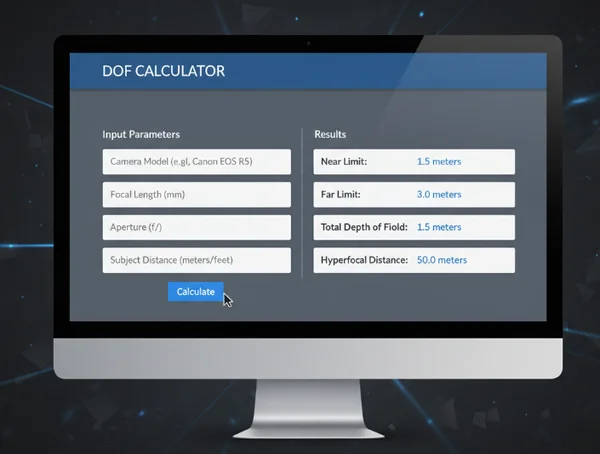
When a subject is moving toward or away from you, the "sharp zone" moves with them. To ensure they stay clear, you need to know your "Near Limit" and "Far Limit." The DOF calculator provides these numbers clearly.
For example, if you are photographing a child running in a park, you might focus at 5 meters. The calculator might show that everything from 4.5 meters to 5.6 meters is sharp. This gives you a one-meter "window" of error. If the child stays within that window, your shot will be crisp. Understanding these boundaries helps you time your shots for when the subject enters your pre-planned sharp zone.
Zone Focusing Techniques with Calculator Assistance
Zone focusing is a classic technique used by street photographers. Instead of relying on slow autofocus, you set your focus to a specific distance manually and use a narrow aperture (like f/8 or f/11) to create a large depth of field.
You can use the depth calculator to find the "Hyperfocal Distance." This is the magic point where everything from half that distance to infinity is in focus. If you set your lens to the hyperfocal distance, you don't even need to focus. You just point and shoot. This is the ultimate way to use semi-auto logic for maximum speed and efficiency.
When to Switch from Aperture Priority: Shutter Speed Considerations
While Aperture Priority is excellent, it has one weakness: shutter speed. In low light, the camera might choose a shutter speed that is too slow, causing motion blur.
If shutter speeds fall below 1/125s when capturing motion, try Auto ISO or Shutter Priority mode (Tv/S). However, for most daylight scenarios, sticking with Aperture Priority and checking your focus zones remains the most effective way to control the artistic look of your images.
Reactive Shooting Depth Guide for Real-World Photography
A reactive shooting depth guide is about being ready for anything. Real-world photography is messy and unpredictable. By combining your technical knowledge with a reliable tool, you can adapt to any situation without losing your creative edge.
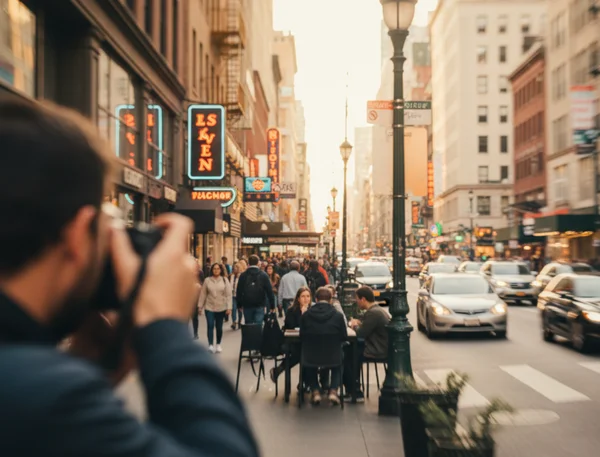
Street Photography: Quick Adjustments in Changing Light
Street photography often involves moving between bright sunlight and deep shadows. In Aperture Priority, your camera handles these light changes instantly.
Your job is to manage the depth. If you turn a corner and see a beautiful architectural detail, you might want a deep DOF (f/11). If you see a character-filled face, you might want a shallow DOF (f/2.8). By having previously checked a lens simulator, you will know exactly how much to turn your dial to get the focus range you need for that specific focal length.
Documentary Work: Maintaining Subject Connection While Controlling DOF
In documentary photography, the most important thing is the connection with your subject. If you are constantly looking down at your camera to change manual settings, you lose that human connection.
Aperture Priority allows you to keep your eye on the viewfinder. Because you have already used a calculator to understand your lens's behavior, you can adjust the aperture by "feel." You know that two clicks of the dial will widen the focus just enough to include a second person in the frame. This technical mastery allows you to stay present in the moment.
Event Photography: Balancing Background Blur and Subject Clarity
Events like weddings or corporate parties are challenging because you often need to switch between single portraits and large group shots.
For a single person, you want a blurred background to make them "pop." For a group of five people, you need enough depth of field so that the person in the back row is just as sharp as the person in the front. Use the online tool to find the "sweet spot" aperture for groups at your common shooting distances. Usually, f/5.6 or f/8 is the hero here, providing enough depth without requiring massive amounts of light.
Boost Your Precision with Semi-Auto Shooting
Mastering the balance between speed and precision is what separates great photographers from the rest. By using Aperture Priority, you take control of the most important creative element—the depth of field—while letting your camera handle the math of exposure.
However, the camera doesn't know how much of your scene needs to be sharp; only you do. That is why using a planning tool is so vital. It removes the guesswork and gives you the "math" behind the art. You can visualize the sharp zones and understand the limits of your equipment before you even arrive at the location.
Stop guessing and start calculating. Use our DOF calculator to lock in your sharpness before you shoot. Stop hoping for sharp shots—plan them. Use our visualize your focus zones tool to see your limits before you shoot. Whether you’re chasing hyperfocal landscapes or creamy bokeh portraits, nail the math behind the art.
Aperture Priority + DOF Calculator FAQs
What is depth of field and why does it matter in aperture priority mode?
Depth of field (DOF) is the distance between the nearest and farthest objects that appear sharp in an image. In Aperture Priority mode, you have direct control over this "sharp zone" by choosing the f-stop. It matters because it determines what the viewer focuses on and how much of the story you tell in a single frame.
How do I calculate depth of field for my specific camera and lens?
The easiest and most accurate way is to use a dedicated calculator. You simply enter your camera sensor size (like Full Frame or APS-C), your lens focal length, and your chosen aperture. The tool will instantly show you the near focus, far focus, and total depth of field.
Does aperture affect depth of field differently in semi-auto modes?
No, the physics of light remains the same regardless of the mode you use. Whether you are in Manual or Aperture Priority, a wider aperture (small f-number like f/1.8) creates a shallower depth of field. The benefit of semi-auto mode is that it allows you to change these values quickly while the camera maintains a balanced exposure.
How can I ensure everything in my shot remains in focus when shooting in aperture priority?
To get everything in focus, you should use a narrow aperture (like f/8 to f/16) and focus at the "Hyperfocal Distance." You can find this specific distance using our hyperfocal calculator. Focusing at this point ensures maximum sharpness from the foreground all the way to the horizon.
When should I consider switching to manual mode instead of aperture priority?
Manual mode is best for situations where the light is very consistent but the camera's meter might get confused—such as in a studio, during a fireworks display, or when shooting long-exposure night photography. For almost all other "reactive" situations, Aperture Priority combined with a planning tool is faster and just as precise.