Macro Photography Depth of Field: Your Essential DOF Calculator
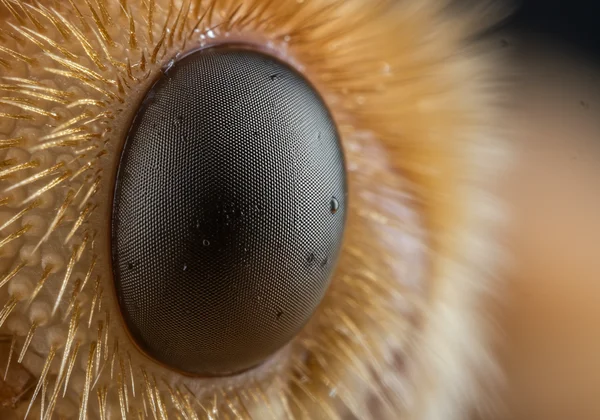
The enchanting world of macro photography reveals details invisible to the naked eye, from the intricate patterns on an insect's wing to the delicate texture of a flower petal. Yet, this fascinating genre presents a formidable technical challenge: a razor-thin depth of field. Many photographers struggle with missed focus and blurry subjects, but what if you could conquer this challenge before you even press the shutter? This guide will demystify macro photography depth of field and show you how to calculate depth of field with precision, turning frustrating guesswork into predictable, stunning results with our essential online tool.
The core problem lies in the physics of close-up work. As you increase magnification to get closer to your subject, the zone of acceptable sharpness shrinks dramatically. This often leaves you with a tiny sliver of your image in focus while the rest falls into a blur. To achieve your creative vision, whether it's an isolated, tack-sharp subject or complete clarity across a small object, you need a way to plan. This is where a powerful depth of field calculator becomes your most valuable asset.
The Unique Challenges of Depth of Field for Macro Photography
Understanding why macro depth of field (DOF) is so notoriously shallow is the first step toward mastering it. Unlike landscape or portrait photography, the variables in macro work on a much more compressed scale, magnifying the impact of every small adjustment. This isn't a flaw in your gear; it's a fundamental principle of optics that requires a strategic approach.
Why Magnification Dramatically Shrinks Your Depth of Field
The single biggest factor affecting your DOF in macro is magnification. As you move your lens closer to a subject to achieve a life-sized (1:1) or greater reproduction, the depth of field collapses. A change in focusing distance of just a few millimeters can be the difference between a perfectly sharp eye and a blurry one. This inverse relationship means that the more you magnify your tiny world, the less of it will be in focus at any given aperture. Planning your shot with a reliable f-stop calculator is no longer a luxury—it's a necessity.
Understanding the "Razor-Thin" Focus Plane in Close-Up Shots
Photographers often describe the focus area in macro as razor-thin focus, and for good reason. At high magnifications, your total depth of field might be less than a single millimeter. This shallow focus plane demands extreme precision. Even the slightest movement from you or your subject can shift the focus away from your intended point. This is also where the concept of the "Circle of Confusion" becomes critical, as it defines the acceptable level of sharpness. Our tool handles this complex calculation for you, allowing you to concentrate on the creative aspects of your shot.
Common Macro DOF Mistakes and Missed Focus Scenarios
Without proper planning, it's easy to fall into common traps. A classic mistake is focusing on the front of an insect's head, only to find its crucial antennae or eyes are soft and out of focus. In product photography, you might nail the focus on a brand logo but lose the sharpness on the product's key features just centimeters behind it. These missed close-up shots are frustrating and can ruin an otherwise perfect composition. By calculating your DOF beforehand, you can see exactly where your sharp zone begins and ends, preventing these common errors.
How Our DOF Calculator Becomes Your Macro Focus Assistant
Instead of relying on trial and error, a dedicated focus calculator macro tool empowers you with foresight. Our online DOF Calculator is specifically designed to give you the precise data needed to execute flawless macro shots. It translates complex optical formulas into simple, actionable information, making it an indispensable assistant for both field and studio work.
Step-by-Step: Planning Precise Macro Shots with the Calculator
Using the calculator is an intuitive process that integrates seamlessly into your pre-shoot workflow. By understanding how aperture depth of field works, you can take full control.
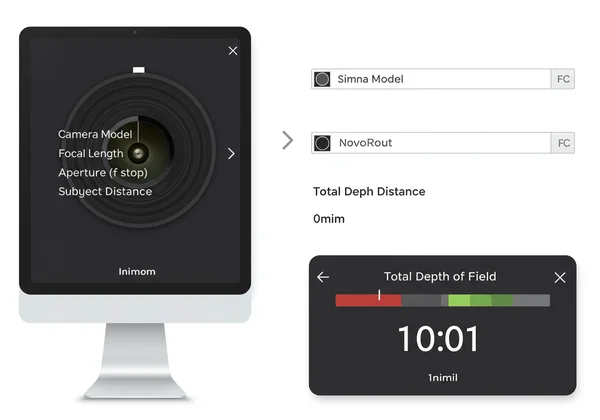
- Select Your Camera: Choose your camera model from the dropdown list. This automatically sets the correct sensor size and Circle of Confusion for accurate calculations.
- Enter Focal Length: Input the focal length of your macro lens (e.g., 100mm).
- Set Your Aperture (f-stop): Adjust the slider or type in the f-stop you plan to use (e.g., f/8).
- Define Subject Distance: This is the most critical input for macro. Precisely enter the distance from your camera's sensor to the subject.
- Analyze the Results: Instantly, the calculator will provide the total depth of field, telling you the exact range (in millimeters or inches) that will be acceptably sharp.
With this data, you can confidently set your camera, knowing your subject will be perfectly in focus. Plan your shot with this powerful tool today.
Visualizing Your Focus Range: What the Graph Shows You
Numbers are useful, but a visual representation is often more powerful. Our calculator’s unique feature is the "Depth of Field Visualization" graph. This dynamic chart shows you a clear, graphical representation of your focus plane. The red line marks your exact point of focus, while the blue shaded area illustrates the total zone of sharpness in front of and behind that point. For macro work, this visual aid is invaluable for understanding just how shallow your focus area truly is and how to position it perfectly on your subject.
Example Workflow: Capturing a Pin-Sharp Insect Portrait
Imagine you're photographing a ladybug on a leaf. You want its eyes and head to be perfectly sharp, with the background softly blurred.
- Goal: Pin-sharp focus on the ladybug's head, which is about 2mm deep.
- Setup: You're using a full-frame camera with a 100mm macro lens at a distance of 0.3 meters.
- Planning with the Tool: You open our dof simulator and input your settings. You start at f/2.8 and see the total DOF is only 0.2mm—not nearly enough. You adjust the aperture to f/11. The calculator now shows a total DOF of 0.8mm. Still too shallow. Finally, you set it to f/16, and the calculator reports a total DOF of 1.1mm, with about 0.55mm in front of the focus point and 0.55mm behind it.
This is still tight, but now you know exactly what you're working with. You can confidently focus on the ladybug’s eyes, knowing the entire head should fall within that 1.1mm zone of sharpness.

Mastering Shallow and Deep Depth of Field in Macro Photography
Controlling depth of field is not just about achieving sharpness; it’s about artistic expression. Whether you want a dreamy, abstract look or clinical, edge-to-edge clarity, our calculator is the key. It helps you master both shallow dof macro techniques and deep focus applications with equal precision.
Achieving Dreamy Background Blur with Controlled Shallow DOF
To create a beautiful, creamy blurry background that makes your subject pop, you need a very shallow depth of field. This is achieved by using a wide aperture like f/2.8 or f/4. However, "wide" in macro is still extremely limited. Use our online DOF tool to determine the widest possible aperture that still keeps your entire subject in focus. This allows you to maximize background blur without sacrificing the critical sharpness of your main subject.
Ensuring Edge-to-Edge Sharpness for Product and Specimen Shots
For professional product photographers or scientific documentation, the goal is often the opposite: achieving complete edge-to-edge sharpness. This requires using a narrow aperture (a high f-stop number) like f/16 or f/22 to maximize the depth of field. The calculator will show you exactly how much DOF you gain with each stop, helping you find the perfect balance. It can help you determine if a single shot is sufficient or if you need to consider more advanced techniques.
Beyond a Single Shot: When Focus Stacking Might Be Your Next Step
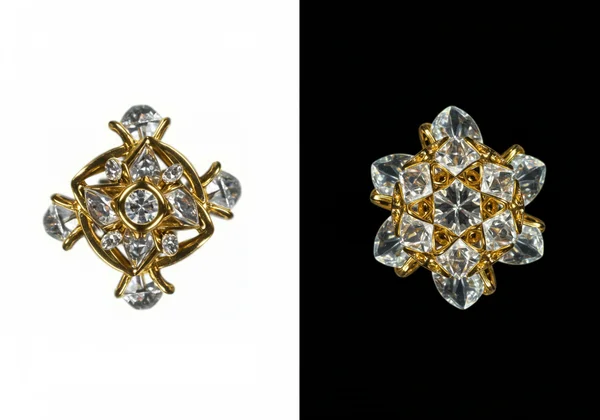
Sometimes, even the smallest aperture won't provide enough depth of field to get an entire object, like a piece of jewelry or a complex flower, completely sharp. When our calculator shows that your required DOF exceeds what's possible in a single frame, it’s a clear indicator that you should use an advanced technique called focus stacking. This involves taking multiple photos focused at different points and merging them in software. Our tool helps you make that decision efficiently, saving you time in the field.
The Takeaway
The intricate challenges of macro photography depth of field should inspire, not intimidate. The power to control that razor-thin plane of focus is now at your fingertips. By moving beyond guesswork and embracing precise planning, you can transform your close-up photography from a game of chance into an act of intention. Our intuitive DOF Calculator is the bridge between your creative vision and a technically perfect final image.
Stop letting missed focus stand in the way of your masterpiece. Visit our DOF Calculator now, input your settings, and unlock the full potential of your macro lens today.
Frequently Asked Questions About Macro Depth of Field & Calculators
What is Depth of Field in macro photography and why is it so limited?
Depth of field (DOF) is the distance between the nearest and farthest objects in an image that appear acceptably sharp. In macro photography, DOF is extremely limited because of the high magnification required. As you get closer to your subject to make it appear larger, the laws of optics dictate that the zone of sharpness drastically decreases.
How does aperture specifically affect macro depth of field?
Aperture has the same effect in macro as in other photography types, but its impact feels more dramatic. A wider aperture (e.g., f/2.8) results in a shallower DOF, which is great for isolating a subject. A narrower aperture (e.g., f/16) increases the DOF, helping to get more of a small object in focus. You can model these changes instantly with a lens simulator.
Can a DOF calculator accurately predict focus for extreme close-ups?
Yes, absolutely. A DOF calculator uses standardized optical formulas that are highly accurate, provided you input the correct data (camera sensor, focal length, aperture, and especially the subject distance). For macro work, measuring your subject distance precisely is key to getting a reliable prediction from the tool.
What is the optimal F-stop for achieving maximum sharpness in macro?
There is no single "optimal" f-stop; it depends on your goal. However, many macro photographers work in the f/8 to f/16 range. This provides a good balance between achieving a deep enough DOF to cover the subject and avoiding "diffraction," an optical effect at very narrow apertures (like f/22 and beyond) that can soften the entire image.
How can I achieve a truly blurry background in macro photography?
To get a very blurry background, you need to combine several factors: use a wide aperture (low f-stop number), use a longer focal length macro lens (like 100mm or 150mm), get as close to your subject as possible, and ensure there is significant distance between your subject and the background. Our DOF calculator can help you plan the perfect combination for maximum background blur.