Depth of Field for Beginners: Visual DOF Calculator Guide
Are you struggling to get that beautiful blurry background in your portraits or that tack-sharp focus in your landscape shots? If confusing terms like "aperture" and "focal length" make understanding depth of field feel like a blurry mess, you are not alone. Many aspiring artists find these concepts tricky at first.
Let’s fix that. By the end, you’ll know how to control sharpness like a pro. We will demystify the core ideas behind Depth of Field (DOF) in simple, clear language. More importantly, we'll show you how our powerful online tool can transform your understanding from theoretical to practical. With its unique visual chart, you can finally see how your camera settings affect your photos before you even press the shutter.
Forget complex math and confusing charts. True creative control begins with understanding, and the best way to understand is to visualize. Let's explore how to master your photos with our intuitive DOF Calculator.
Your Visual Guide to the DOF Calculator Interface
Think of our calculator as your digital co-pilot for photography. It’s designed to be simple, but it gives you incredibly powerful information. To get started, you just need to understand its two main parts: the settings panel where you tell it about your shot, and the results area where it shows you exactly what will be in focus. Let's take a quick tour.
Camera Settings Explained
On the left side of the tool, you'll find the "Camera Settings." This is where you input the four key variables that determine your depth of field. Don't worry if these terms are new; they're easy to grasp.
- Camera Model: Select your camera from the dropdown list. This automatically sets a value called the "Circle of Confusion," which is a technical way of defining what our eyes perceive as sharp for your camera's sensor size. For beginners, simply picking your model is all you need to do.
- Focal Length (mm): This is essentially the "zoom" of your lens. A low number like 24mm is a wide-angle lens, capturing a broad scene. A high number like 85mm or 200mm is a telephoto lens, which brings distant objects closer.
- Aperture (f-stop): This is the opening in your lens that lets light in. It has a huge impact on DOF. A small f-number (like f/1.8) means a wide-open aperture, which creates a very shallow depth of field (blurry background). A large f-number (like f/16) means a tiny opening, creating a deep depth of field (more of the scene is sharp).
- Focus Distance: This is simply the distance from your camera to the subject you are focusing on. You can set it in meters or feet.
Adjust four settings—camera model, focal length, aperture, and focus distance. The calculator uses these to predict sharpness instantly.
Understanding the Results Table
Once you've entered your settings, the right side of the tool instantly displays the "Depth of Field Results." This is the raw data that tells you everything about your zone of focus. It might look like just a bunch of numbers, but they tell a clear story.
- Near Focus Limit: This is the closest point to your camera that will appear acceptably sharp. Anything nearer than this distance will start to look blurry.
- Far Focus Limit: This is the furthest point from your camera that will still be sharp. Anything beyond this distance will fade into blur.
- Total Depth of Field: This is the total distance between the Near and Far focus limits. It’s the size of your entire "sharpness zone." A small number here means a shallow DOF, while a large number means a deep DOF.
The results also show you how much of that sharp zone is in front of your subject versus behind it. This is useful for knowing exactly where your focus lies within the scene.
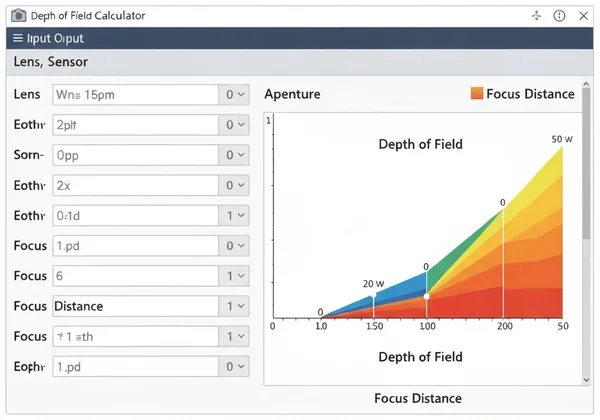
Seeing is Believing: The Depth of Field Visualization Chart
Numbers are useful, but a picture is worth a thousand words. This is where our calculator truly shines for beginners. Below the numbers, you’ll find the "Depth of Field Visualization" chart. This simple graph turns abstract data into an easy-to-understand map of your photo's focus. It's the best way to build your intuition.

Reading the Blue Zone: Focus Range Visualized
The visualization chart is incredibly straightforward. It shows a horizontal line representing distance, stretching away from your camera. On this line, you’ll see two key elements:
- The Red Focus Line: This vertical red line shows the exact distance you are focused on.
- The Blue Shaded Zone: This blue bar is your entire depth of field—your "zone of acceptable sharpness."
Anything that falls within this blue shaded area in your real-life scene will be in focus in your final image. If you want a person's entire body to be sharp, make sure they fit within the blue bar. If you want a mountain range to be in focus, the blue bar needs to cover it. It's that simple.
Playing with Parameters: How Settings Change Your Depth of Field
The real magic happens when you start playing with the settings and watch the visualization chart change in real time. This is how you truly learn what your camera can do.
Go ahead and simulate DOF for portraits or landscapes. Try sliding the Aperture value. As you move to a smaller f-number (like f/2.8), watch the blue bar shrink into a thin sliver. This is how you get that creamy, blurry background for portraits. Now, slide it to a larger f-number (like f/11 or f/16). See how the blue bar expands dramatically? That's how you get a landscape sharp from the foreground flowers to the distant mountains.
Next, play with the Focal Length. Set a wide angle like 35mm and notice how deep the blue bar is. Now, switch to a telephoto lens like 135mm without changing anything else. The blue bar will become much, much thinner. This shows you why longer lenses are so great at isolating a subject from their background.
Mastering Your Vision: From Blurry Backgrounds to Sharp Landscapes
Understanding the tool is the first step. The next is using it to create the specific photos you envision. Whether you want a dreamy portrait or a crystal-clear landscape, our calculator is the perfect planning tool to help you achieve your artistic goals.
Achieving Dreamy Bokeh
"Bokeh" is a term for the beautiful, soft, out-of-focus quality of a blurry background. This effect is created by using a shallow depth of field, meaning only a very thin slice of your scene is in focus. This makes your subject pop and is a hallmark of professional portraiture.
To get this effect, you need to:
- Use a wide aperture (the smallest f-number your lens allows, like f/1.4 or f/1.8).
- Use a longer focal length (lenses like 50mm, 85mm, or 135mm are popular for portraits).
- Get physically closer to your subject.
- Ensure there is plenty of distance between your subject and the background.
Before your next portrait session, plan the perfect shot with the DOF calculator. You'll see a tiny blue bar, confirming you've set up the perfect conditions for that dreamy, professional look.

Nailing Sharp Landscapes with Hyperfocal Distance
Landscapes demand sharpness from foreground to background. You need everything crisp—rocks at your feet, distant clouds, and everything in between. This is called a deep depth of field. You can achieve this with a narrow aperture (like f/11 or f/16), but professionals use a secret weapon: hyperfocal distance.
Hyperfocal distance is the specific focus point that gives you the maximum possible depth of field for your settings. When you focus at this "sweet spot," your sharp zone will extend from half that distance all the way to infinity.
Calculating this used to involve complex formulas. Now, you don't have to. Our tool calculates it for you automatically and displays it in the results table. For your next landscape shot, simply find your hyperfocal distance with the tool, set your lens to focus at that exact distance, and you will capture the sharpest possible image of the entire scene.
The Takeaway
Stop guessing with your camera settings. Our DOF Calculator empowers you to plan shots with confidence, transforming abstract concepts into a clear, visual plan. Whether you dream of stunning portraits with creamy bokeh or sweeping landscapes sharp from front to back, you have the knowledge to make it happen.
Try it now: Set your camera to f/2.8 and enter the values in our calculator. See how the blue zone shrinks for creamy backgrounds! The more you experiment, the more intuitive it will become.
Ready to practice? Head over and test aperture settings with our DOF Calculator to see it work in real-time!
Understanding Depth of Field & the Calculator
What is Depth of Field (DoF) in Photography?
Depth of Field, or DoF, refers to the range of distance in a photo that appears acceptably sharp. A "shallow" DoF means only a small part of the image is in focus (often used for portraits), while a "deep" DoF means most of the image is in focus (ideal for landscapes).
How Do I Calculate Depth of Field for My Photos?
Traditionally, photographers used complex mathematical formulas or printed charts. Today, the easiest and most accurate method is to use a digital tool. By entering your camera, lens, aperture, and focus distance into our free calculator, you can get instant, precise results without any manual math.
How Do Aperture and Focal Length Affect Depth of Field?
These two settings have a major impact. A wider aperture (smaller f-number like f/1.8) drastically reduces your DoF, creating more background blur. A longer focal length (like 200mm) also reduces DoF compared to a wider lens (like 24mm). Combining a wide aperture with a long focal length is the classic recipe for maximum background blur.
What is Hyperfocal Distance and How Can it Help My Photography?
Hyperfocal distance is the closest distance at which you can focus while keeping objects at infinity acceptably sharp. Focusing at this specific point gives you the absolute maximum depth of field possible for your current settings. It's an essential technique for landscape photographers. You can practice finding the hyperfocal distance for your camera and lens to see how much sharpness you can achieve.