Circle of Confusion Explained: Mastering Sharpness with a DOF Calculator
Ever wondered why some of your photos look tack sharp while others are just slightly soft, even when you thought you nailed the focus? The answer often lies in a tiny, crucial concept that underpins all of photography: the circle of confusion (CoC). While many photographers have heard the term, few grasp its practical power. What is circle of confusion, and how can understanding it transform your images from good to gallery-worthy?
This guide will demystify the CoC, explaining its role in perceived sharpness and its direct impact on depth of field. More importantly, we'll show you how to leverage this knowledge for ultimate creative control. By the end, you’ll be able to use tools like our intuitive DOF Calculator to plan your shots with the precision of a seasoned professional.
Understanding the Circle of Confusion (CoC) Basics
At its core, the Circle of Confusion is about how light and lenses work. In a perfect world, a single point of light from your subject would be focused by your lens into a single, perfect point on your camera's sensor. However, optics are never perfect. Instead, a point of light is rendered as a tiny, blurred circle on the sensor. The CoC is the maximum size this circle can be before our eyes perceive it as being out of focus.
Think of it as the threshold between sharp and unsharp. If the blur circle is smaller than the acceptable Circle of Confusion value, we see it as a sharp point. If it's larger, we see it as a soft, blurry dot. This single value is the secret ingredient that determines the entire range of acceptable sharpness in your photograph.

Defining the CoC: The Zone of Perceived Sharpness
The term "acceptable sharpness" is key here because sharpness is subjective and depends on several factors. The CoC isn't a universal law of physics but a standard based on human vision and viewing conditions. It quantifies the limits of our perceived sharpness.
Imagine you're creating a large wall print. From ten feet away, a tiny amount of blur would be completely invisible. However, if you inspect that same print with your nose just inches away, that same blur might become obvious. The Circle of Confusion provides a standardized measurement to work from, allowing photographers to plan for a specific level of sharpness based on the intended use of the image.
CoC's Critical Role in Depth of Field Calculation
So, how does this tiny circle relate to the grand concept of Depth of Field (DOF)? The Circle of Confusion is the foundational building block for every DOF calculation. Depth of field is simply the zone in front of and behind your focus point where the blur circles are smaller than the accepted CoC value.
When you use a depth of field calculator, you input your camera settings—aperture, focal length, and focus distance. The calculator then uses these inputs along with a specific CoC value to determine the precise near and far limits of your sharp zone. A smaller, stricter CoC value will result in a shallower depth of field, while a larger, more lenient CoC will yield a deeper one. Without the CoC, calculating DOF would be impossible.

Key Factors That Influence Your Circle of Confusion
The "correct" Circle of Confusion value isn't fixed; it changes based on your equipment and how your final image will be displayed. Understanding these variables is crucial for moving beyond default settings and taking full control of your image quality. Two of the most significant factors are your camera's sensor size and the final viewing conditions.
Camera Sensor Size: The CoC Multiplier Effect
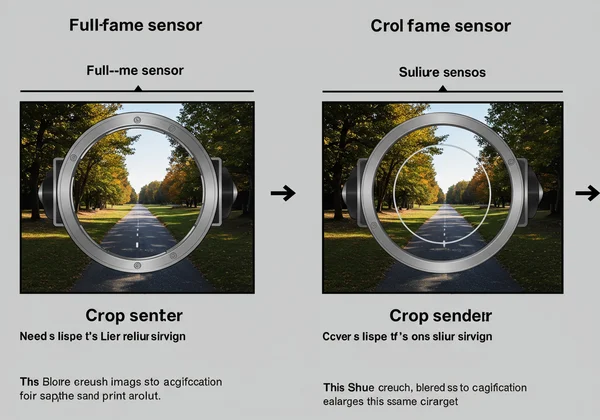
One of the most common points of confusion is how camera sensor size affects CoC. A camera with a smaller sensor, like an APS-C or Micro Four Thirds model, requires a smaller (stricter) CoC value than a full-frame camera to achieve the same perceived sharpness in a final print of the same size.
Why? Because an image from a crop sensor must be enlarged more than an image from a full-frame sensor to create, for example, an 8x10 print. This extra magnification also enlarges any blur that was present in the original capture. Therefore, to ensure the blur circles remain acceptably small in the final print, they must start out much smaller on the sensor itself. Our tool automatically adjusts the CoC when you select your camera model, simplifying this complex variable for you.
Viewing Conditions: Print Size & Observation Distance
How you intend to display your photo dramatically impacts the acceptable CoC. The required sharpness for a small web image is far less demanding than for a massive, fine-art gallery print size. This is all tied to the final viewing distance.
Consider these scenarios:
- Instagram Post: Viewed on a small phone screen, a relatively large CoC is perfectly acceptable.
- Magazine Spread: An 8x10 print viewed from a foot away requires a much higher standard of sharpness, and thus a smaller CoC.
- Billboard: A giant billboard viewed from a hundred feet away can have a massive CoC value, as the distance makes the blur imperceptible.
Professional photographers always consider the final output. They know that to achieve a tack-sharp 40x60 inch print, they need to plan their shot using a much smaller CoC value than the default settings assume. You can experiment with this yourself using our advanced dof simulator.
Mastering Sharpness with Custom CoC & Our DOF Calculator
Understanding the theory is the first step. The second, more powerful step is applying it. While most online calculators hide the Circle of Confusion or use a fixed default, our DOF Calculator empowers you to take control. By adjusting the CoC, you can move from generic estimations to precise, professional-grade planning.
Why Expert Photographers Use Custom CoC Values
Advanced landscape, architectural, and macro photographers rarely rely on default values. They use custom CoC settings because their work demands the highest level of precision. For a landscape photographer selling large prints, ensuring edge-to-edge sharpness is paramount. By inputting a stricter CoC value, they can calculate a more accurate hyperfocal distance, guaranteeing that everything from the foreground flowers to the distant mountains is rendered with critical sharpness.
Similarly, a product photographer needs to ensure an entire object, like a watch, is sharp from front to back. A generic DOF calculation might not be sufficient. By using a custom CoC tailored to their client's high-resolution needs, they can guarantee the final image meets the most demanding standards of commercial image quality.
Your Guide to Using the DOF Calculator's CoC Settings
Putting this into practice is easier than you think. Our tool is designed for both beginners and experts.
-
Select Your Camera: Navigate to the DOF Calculator homepage. The first step is to choose your camera model from the dropdown list. This automatically loads the standard, manufacturer-recommended CoC for your sensor size—perfect for everyday shooting.
-
Access Custom Settings: For more control, you can ignore the preset and directly input your own CoC value in the designated field.
-
Visualize the Difference: Now, the magic happens. Enter your lens and aperture settings. First, use the default CoC and note the "Total" depth of field. Then, enter a smaller CoC (e.g., reduce it by 30%) and watch how the visualized blue sharpness zone shrinks. This real-time feedback instantly demonstrates how a stricter sharpness standard reduces your margin for error.

By planning your shots with this level of detail, you leave nothing to chance. You'll know exactly what will be sharp before you even press the shutter.
Unlock Your Photography's Sharpest Potential
The Circle of Confusion is not just a technical term; it is the very definition of sharpness in your photography. By moving beyond a surface-level understanding, you unlock a new dimension of creative intent. You can now decide precisely how sharp your images should be and execute that vision flawlessly.
No longer will you have to guess whether your background will be beautifully blurred or your landscape will be sharp from front to back. The power to plan is in your hands. Take this knowledge, apply it, and watch the quality and consistency of your work soar. Ready to transform your approach to sharpness? Try our free tool and see the principles in action.
Frequently Asked Questions About Circle of Confusion
What is the standard Circle of Confusion value?
While there's no single universal standard, a widely accepted CoC value for 35mm full-frame cameras is approximately 0.030mm. For APS-C sensors, it's around 0.020mm. These are simply industry-standard starting points based on producing an acceptably sharp 8x10 print viewed from about 10-12 inches.
How does Circle of Confusion affect my depth of field?
The relationship is inverse. A smaller (stricter) Circle of Confusion value will result in a shallower depth of field because it narrows the range of what is considered "acceptably sharp." Conversely, a larger (more lenient) CoC value will give you a deeper depth of field. You can test this instantly with our depth of field chart.
Can the Circle of Confusion vary for the same camera?
Absolutely. The standard CoC for your camera is just a guideline. You should use a custom, smaller CoC if your final image will be heavily cropped or printed very large. This ensures that the increased magnification doesn't reveal unwanted softness. Planning for the final output is key to professional results.
Why is Circle of Confusion important for achieving sharp photos?
It is important because it fundamentally defines your standard for sharpness. By understanding and controlling the CoC, you are no longer just focusing on a single point; you are planning an entire zone of acceptable focus. This allows you to master techniques like hyperfocal distance for landscapes or to ensure critical sharpness in macro and product photography, giving you predictable, repeatable, and tack-sharp results every time you shoot. Master this concept with our focus calculator today.